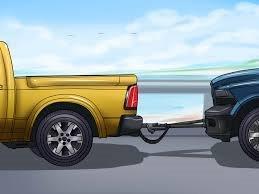
 Find a good mounting area. This should be a location on your front bumper, as that’s where the tow bar will be attaching to the back of your towing vehicle. Make sure that your tow bar will sit properly on your front bumper. This means that you’ll want to put the tow bar up against the bumper and see that it fits comfortably.
You also want to test that there’s enough room, on the width of the bumper, to drill your holes to attach the bar. You’ll want to make sure the tow bar is perfectly parallel. Make sure that you’re attaching it directly to your bumper. Any free-hanging paneling that protects the front end of your car will be in the way of your strongest mounting point.
2) Prepare your vehicle for drilling.
 Before picking up any tool, make sure you know exactly what you’ll be doing with it. You don’t want to accidentally drill into your radiator or cause any electrical damage.
Create a one-inch cross of tape at your place of drilling. This will prevent the drill from sliding off your intended entry point.
Use a hammer and a sharp centre punch to create a light indentation in your bumper. Your drill bit will rest on this point when it enters your vehicle.
3) Drill out the holes for the tow bar
 You’ll be threading the bolts through the holes of the tow bar and into the chassis of the vehicle.
Start by drilling a hole smaller than your bolt by attaching a smaller drill bit. If you’re attempting to make a 3/8 inch hole, start with a 1/3 inch drill bit, and then expand the hole with 3/16 inch bit. After that, you can drill with the proper 3/8 bit.
Make sure that you still have a person holding the other end of the tow bar, as drilling your holes in straight is unbelievably important. You’ll want to get a drill the corresponds directly to the bolt width of your tow bar brackets.
This information should be found in the manual that came with your tow bar package. If you can’t find this, you can measure the width using a small ruler.
4) Secure the brackets to your car.
 Now that you’ve drilled the accurately sized holes into your bumper, you need to slide the bolts into the chassis of your vehicle. The bolt size will vary depending on the size of your tow bar and your vehicle. The size of the bolts, however, should align with the size of your bracket holes, as well as the holes that you’ve drilled into the bumper.
Make sure that you’re threading the bolts through both the tow bar bracket and the bumper of the vehicle. You can’t slide the bracket onto the bolts.
5) Install your pivot brackets.
 After you’ve secured the tow bar to the front bumper of your vehicle, you’ll need to attach the pivot brackets. These brackets will reach from your tow bar to your towing vehicle. Your bracket will vary slightly depending on the sort of tow bar that you’ve chosen, but the process of securing will be the same.[
Some brackets will be adjustable, You’ll find a separate pair of nut and bolt hardware in your kit which should be slightly larger than the hardware you used for the bar itself. Insert the pivot brackets into the two ends of your tow bar and tighten.
If you have a pivot bracket with adjustable arms, make sure that you do not tighten the bolts completely. This bracket is meant to move slightly. You do, however, want to check the bolts before attaching your vehicle, as you don’t want them to run coming undone. It is a balance of not over-tightening while also ensuring that you don’t let the pivot bracket become loose.
6) Wire your tow bar.
 Before attaching your car to your towing vehicle, you need to wire the tow bar to ensure that your braking lights will flow between both electrical systems of your vehicles. Ensuring that your brake and turn signal lights work in tandem for both vehicles is necessary for the safety of those on the road with you.
Attach the systems between your car and towing vehicle using the colour-coordinated pins on your wiring sockets, each of which corresponds to a different light in your two vehicles.
Depending on how often you plan on towing your car, you can also choose to use removable tail lights. Removable tail lights are the least invasive and easiest to remove from.
They sit at the back of your towed car, and the wiring wraps underneath the towed car and attaches to the electrical system of your towing vehicle. If you plan on towing often, however, these may not be the most viable option.
7) Attach your safety chains between your car and towing vehicle.
 Simply attaching your car to your towing vehicle using the tow bar and pivot brackets won’t cut it.
There should be two sets of safety cables that you’re using. The long set of cables will attach the RV hitch to the base plate arms of your pivot bracket. You’ll then attach the short set of cables between the base plate arms into the frame mount of the tow bar itself.
This will ensure that in the case of any unhitching on the tow bar itself, your car will not careen into traffic. It’s doubly important to take this step if it’s your first time attaching a tow bar, as mistakes can happen.
